How to Test Speech Recognition Engine (ASR) Accuracy and Word Error Rates
Before you invest a ton of money into adopting an ASR service, it’s important to make sure you’re selecting the best option for you. You’ll want to pick the product which offers the highest accuracy for your desired use case while taking into consideration other pertinent factors such as price, customer support, ease of use, and foreign language support.
The problem is, while every service advertises their own “expected” error rate, it’s difficult to determine how exactly they computed it and how well it will generalize to your data. It’s well known that word error rates have high variance across different types of text transcriptions and standardizations. Luckily, Rev provides a tool which allows you to calculate word error rates uniformly across batches of text transcriptions. This way, you can compare the outputs of each ASR service on identical data in order to accurately assess which is best for your use case.
Some Initial Considerations
Before you get started testing different ASR engines, there are a few things to keep in mind.
- Use testing data that’s representative of your use case. That means, if you plan on using an ASR service to transcribe podcasts, then use audio from one of your shows for the test! Don’t use some random audio clip or video that you found online.
- Use a sample file that’s sufficiently long. You’ll want something that’s at least a few minutes, although preferably under an hour. Longer is fine, but it will take longer to test and probably will only provide marginal benefits. You just want something that’s long enough to cover a diverse assortment of words and topics.
- If you anticipate that your source audio will contain technical, foreign or other uncommon terminology, be sure your test file is similar. The same goes for background noise and the acoustics of the environment.
Once you’ve decided on an initial file, you’ll need to submit it to all the speech recognition engines that you want to benchmark and get back the produced transcripts. Once you have these, in whatever format (most commonly, a text file), you can proceed to the next step.
Downloading FSTAlign Source and Docker Image
Rev has created a tool called FSTAlign which you can use to easily align and compare word error rates across transcripts. The first thing to do is clone the git repository onto your local machine. This will give you access to the source code in case you want to view or modify the tool’s implementation. However, it is not strictly necessary for running the tool (for that, we’ll use Docker).
Next, you’ll want to change into that directory and run the following command
git submodule update --init --recursive
This will update all the submodules that are pulled into the repository.
Using Docker
We’ll use Docker to run the FSTAlign tool. Docker is great because it packages all the libraries that are needed for the tool in a virtual container. This is great because it means you don’t need to install anything (aside from Docker), you just need to pull and run the provided Docker image.
To pull the image, go ahead and run
docker pull revdotcom/fstalign
You should see some output like this as the download proceeds.
Downloading Test Data
We’ll also use some test data that Rev has provided, although, of course, you should at some point use your own data. Rev’s data is hosted in this repo. The entire repo is quite large, so instead we’ll do what’s called a sparse checkout which will allow us to download only the subdirectories we’re interested in. First, run the following in your terminal.
mkdir speech-datasets
cd speech-datasets
git init
git remote add -f origin
https://github.com/revdotcom/speech-datasets.git
Our local repository will still be empty at this stage, but Git will have fetched the relevant objects. All that’s left is to check out the ones we want. To do so, we’ll have to briefly update our git config using the following command:git config core.sparseCheckout trueNow we just need to indicate which folders we want to checkout locally by specifying them in the .git/info/sparse-checkout file. Go ahead and run the following:
echo earnings21/output/* >> .git/info/sparse-checkout
echo earnings21/transcripts/nlp_references/* >> .git/info/sparse-checkout
This tells Git to pull all the subdirectories of the “output” directory into our local filesystem as well as the “transcripts/nlp_references” folder which contains the reference texts. Finally, to execute the pull, run
git pull origin main
You should now have access to the output folder and all subfolders. These contain transcripts of a company earnings call as created by six different speech recognition providers: Amazon, Google, Microsoft, Rev, Speechmatics, and Kaldi. The outputs have been processed into “.nlp” files for use with the FSTAlign tool.
FSTAlign Usage
Using the FSTAlign tool is very simple. Check out the output of the FSTAlign help command.
Rev FST Align
Usage: ./fstalign [OPTIONS] [SUBCOMMAND]

Options:
 -h,--help                   Print this help message and exit
 --help-all                  Expand all help
 --version                   Show fstalign version.
Subcommands:
 wer                         Get the WER between a reference and an hypothesis.
 align                       Produce an alignment between an NLP file and a CTM-like input.
We can see that there are two main commands, “wer” and “align”. The one we will use is “wer” which takes in a transcript and a reference and calculates the word error rate of the transcript relevant to the reference. The “align” command produces an alignment of the two which is useful if you want to go in more depth. However, it is out of scope for the purposes of this tutorial.
Running FSTAlign
Now let’s fire up the tool. This is easy to do with Docker, specifically the “docker run” command.. The only trick comes in mounting our local directories into the container so that Docker has access to our transcript files. First, make sure you’re in the root “speech-datasets” directory. Then run the following command from your terminal
docker run -v $(pwd)/earnings21/output/:/fstalign/outputs -v $(pwd)/earnings21/transcripts/nlp_references/:/fstalign/references -it revdotcom/fstalign
It’s a doozy, so we’ll break it down. “Docker run” just tells docker to run the specified container. The “-i” tells it to run interactively which allows us to drop into a docker shell and run fstalign manually. The “-t” flag specifies the tag of the image we want to run. For us, it’s “revdotcom/fstalign”, i.e. the image we pulled earlier. Finally, the two “-v” flags allow us to mount our local files into the interactive container. We load in both the outputs and references. The “-v” flag requires absolute paths which is why we prepend the relative path with “$(pwd)”.
Learn about Rev’s Earnings-21 Dataset
Once you run this command, you should be inside a container that has fstalign installed. Awesome! Type “ls” to see what things look like. You should get an output that looks something like this:
CMakeLists.txt bin build outputs references sample_data src test third-party
The fstalign tool is installed in the “build” folder. To run it, execute the following command.
./build/fstalign wer --ref references/4320211.nlp --hyp outputs/google/4320211.nlp
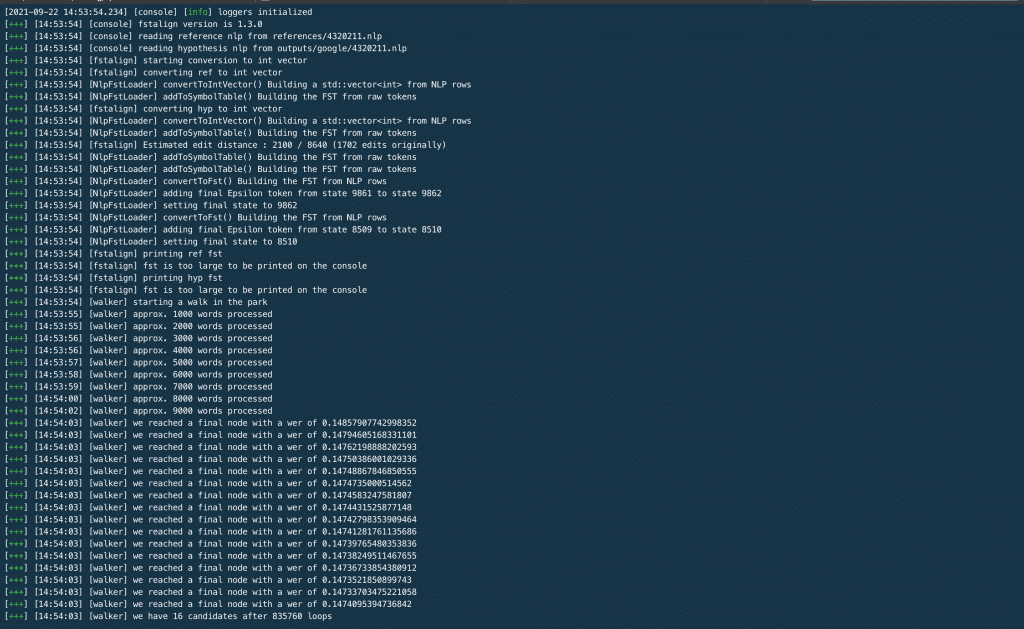
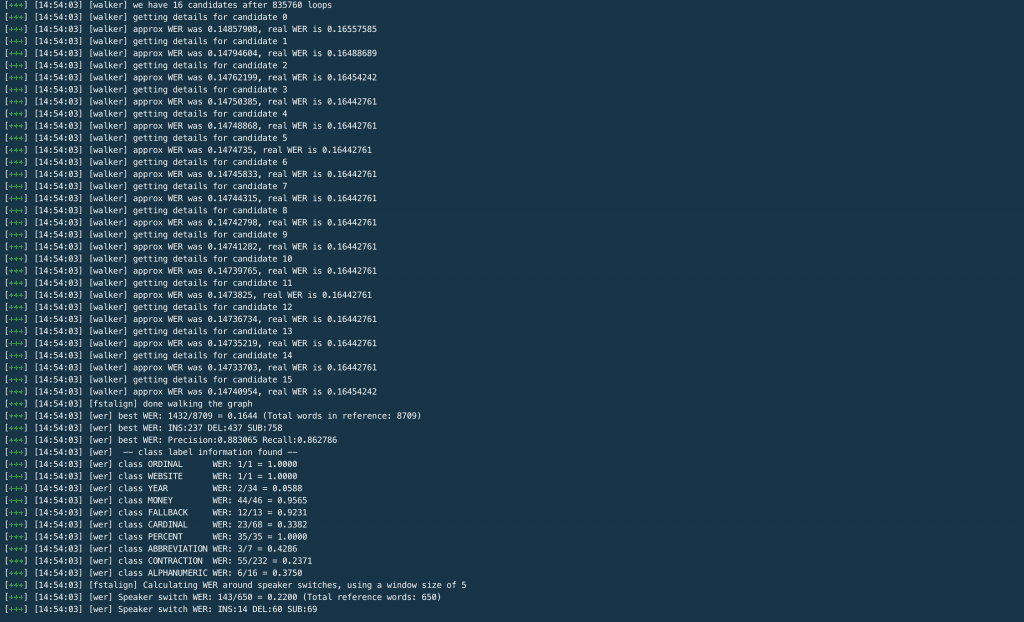
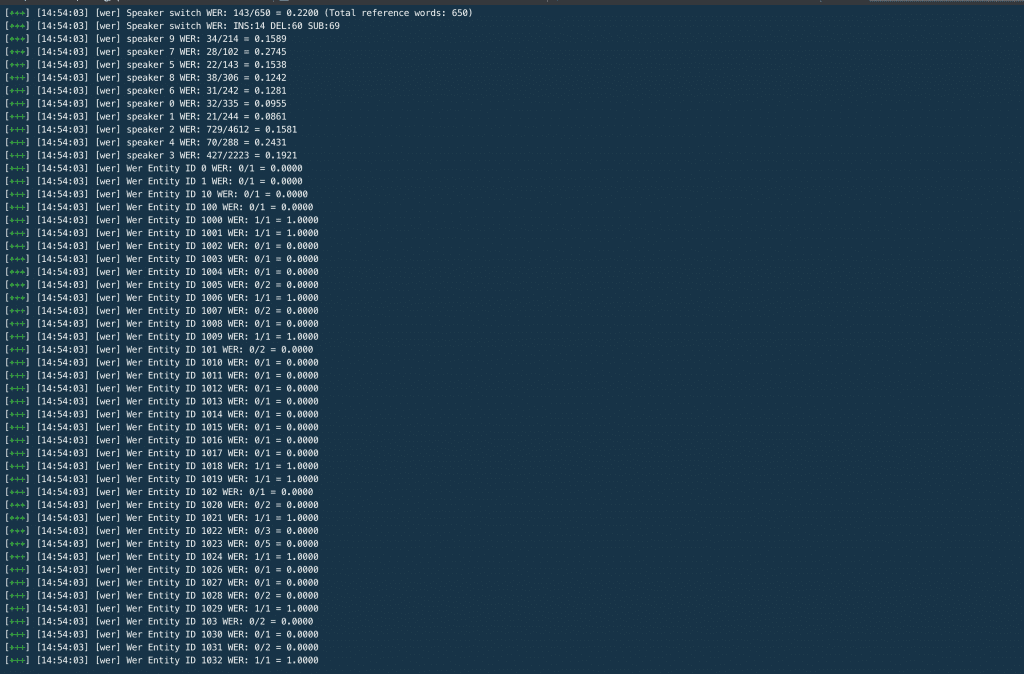
The “–ref” flag specifies the path to the reference file, i.e. the “correct” output produced by a human transcriptionist. The “–hyp” flag specifies the path to the “proposed” output produced by the speech recognition service. In this case, we’ll test the output of the Google ASR system on the first of the earnings call transcripts. When you run the command, you should get an output that looks something like this.


On the third screenshot, you can see the word error rate printed for all 10 speakers in the call. Voila, there you have it! That’s all you need to know to use the tool. Now you can run WER comparisons across all your test audio files and across all ASR systems under consideration.ASR Accuracy RatesThis tool helps developers run their own accuracy & word error rate tests for all automatic speech recognition systems available on the market today. Rev runs frequent tests on the biggest & most popular ASR’s on the market and consistently finds Rev AI to be the most accurate.

Try Rev AI Speech-to-Text API Free
Subscribe to The Rev Blog
Sign up to get Rev content delivered straight to your inbox.


